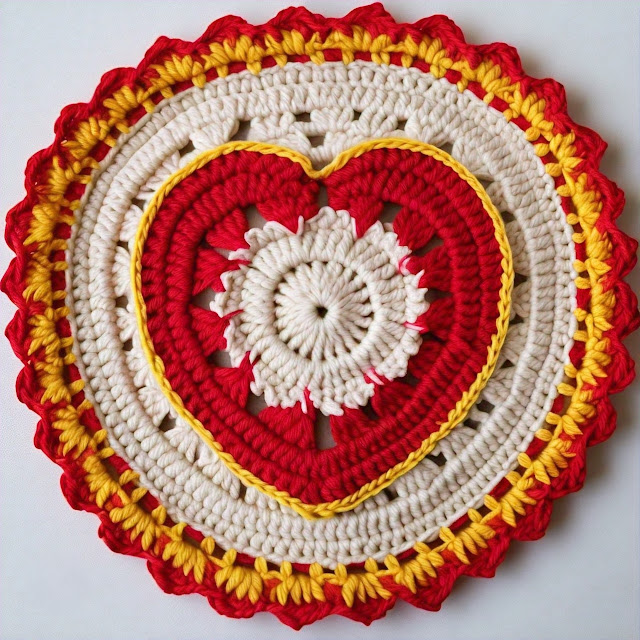
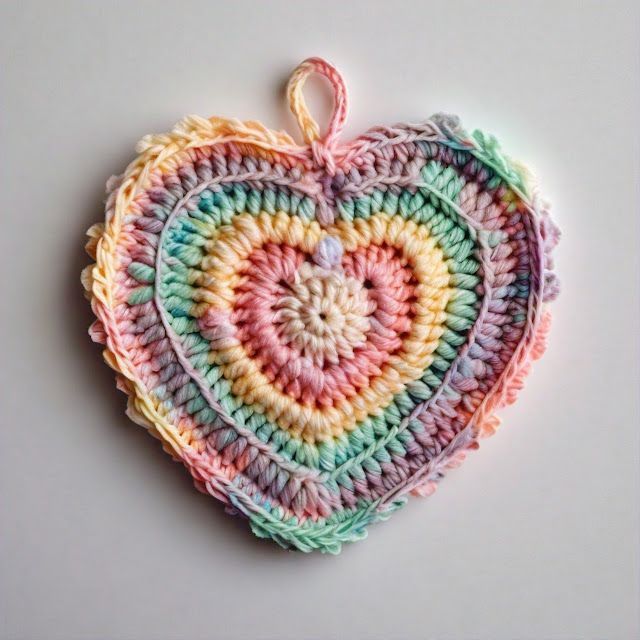
The Free Crochet Heart Coaster Pattern is a delightful and simple project perfect for adding a touch of handmade charm to any table. This pattern guides you through creating a heart-shaped coaster using basic crochet stitches. Ideal for both beginners and seasoned crafters, it involves working in the round to form a heart and finishing with a neat edge. Whether you want to enhance your home decor or make thoughtful gifts, this pattern provides a quick and enjoyable way to create useful and decorative coasters.
Free Crochet Heart Coaster Pattern
Materials:
Cotton yarn (various colors
Crochet hook (size G/4.0 mm or as needed)
Yarn needle
Scissors
Making:
This free crochet Heart Coaster pattern creates a charming and practical addition to any table setting. Start by making a magic ring and working a few rounds of single crochet stitches, gradually increasing to form a heart shape. Add a decorative scalloped edge for a polished look. This pattern is straightforward and beginner-friendly, perfect for adding a touch of handmade warmth to home decor. Each coaster is beautiful and functional, protecting surfaces from hot or cold beverages.
Free Crochet Heart Coaster Pattern: Step-by-Step Guide
Crocheting a heart-shaped coaster is a fun and straightforward project that adds a charming touch to your home decor. This step-by-step pattern will guide you through creating a lovely heart-shaped coaster using basic crochet techniques. Suitable for beginners and experienced crocheters alike, this pattern is perfect for making personalized gifts or sprucing up your living space.
Materials Needed:
Cotton Yarn: Choose a cotton yarn in your preferred color. Cotton yarn is ideal for coasters because it is durable and easy to clean.
Crochet Hook: Use a size G/4.0 mm hook or one that matches your yarn’s recommended size.
Yarn Needle: For weaving in the ends.
Scissors: For cutting the yarn.
Abbreviations:
ch: Chain
sc: Single Crochet
hd: Half Double Crochet
dc: Double Crochet
inc: Increase (2 sc in the same stitch)
sl st: Slip Stitch
st: Stitch
R: Round
Instructions:
1. Start with the Magic Ring
Begin by creating a magic ring. Hold the yarn with your index Finger and thumb, wrap it around to form a loop, and then insert your hook.
2. Round 1: Forming the Base
1: Pull the tail of the yarn to close the ring.
2: Join with a slip stitch (sl st) to the first sc to close the round.
3. Round 2: Increasing Stitches
1: Work 2 sc in each stitch around (12 sts total).
4. Round 3: Shaping the Heart
1: Work I sc in the next stitch, 2 sc in the following stitch around.
5. Round 4: Creating the Heart Shape
1: Work 1 sc in the next 2 stitches, and 2 sc in the next stitch around.
6. Round 5: Defining the Heart
1: Work 1 sc in the next 3 stitches, and 2 sc in the next stitch around.
7. Rounds 6-7: Adding Detail
1: This helps to smooth out the shape of the Heart and provides a solid base for the coaster.
2: Join with a sl st to the first sc after each round.
8. Round 8: Forming the Top of the Heart
1: To start shaping the top of the Heart, work 1 sc in the next 3 stitches, hdc (half double crochet) in the next stitch around. This creates a slight curve at the top of the heart.
9. Round 9: Creating the V Shape
1:Chain 1 (does not count as a stitch). Work sc in the next 2 stitches, 2 dc (double crochet) in the next stitch around. This round helps define the Heart’s V shape at the bottom.
10. Round 10: Finalizing the Shape
1: Work 1 sc in each stitch around to even out the edges and make a clean finish.
2: Join with a sl st to the first sc.
11. Scalloped Edge (Optional)
1: For a decorative scalloped edge, chain 3, then work a slip stitch into the next stitch. Repeat this pattern around the coaster to add a delicate, lacy border.
12. Finishing Touches
1: Fasten off the yarn and cut it, leaving a tail of about 6 inches.
2: Use a yarn needle to weave in any loose ends. This secures your work and gives the Coaster a clean finish.
13. Blocking (Optional)
1: To help the coaster hold its shape and to smooth out any uneven edges, lightly block the Coaster. Wet it and pin it to a flat surface, shaping it into a heart shape.
Congratulations on completing your heart-shaped coaster! This simple yet charming project adds a touch of personal flair to your home. Enjoy your new Coaster or consider making a set to give as thoughtful, handmade gifts.
Free Crochet Heart Coaster Pattern: A Comprehensive Step-by-Step Guide
Creating a heart-shaped coaster is a delightful way to add a touch of handmade charm to your home. Whether you’re decorating your own space or crafting a thoughtful gift, this step-by-step crochet heart coaster pattern is designed to be easy to follow and enjoyable to make. This guide will walk you through each stage of the process, ensuring that even beginners can achieve a beautiful result.
Materials Needed:
Cotton Yarn: Choose a color that complements your decor.
Yarn Needle: For weaving in the ends and finishing the project.
Scissors: For cutting the yarn.
Abbreviations:
ch: Chain
sc: Single Crochet
hdc: Half Double Crochet
dc: Double Crochet
sl st: Slip Stitch
st: Stitch
R: Round
Instructions:
1. Begin with a Magic Ring
2. Round 1: Foundation Ring
Step 1: Into the magic ring, work 6 single crochets (sc).
Step 2: Pull the tail of the yarn to tighten the ring. Join with a slip stitch (sl st) to the first single crochet to close the round.
4. Round 3: Shaping the Heart
Step 1: Work 1 single crochet (sc) in the next stitch, 2 single crochets (sc) in the following stitch around.
5. Round 4: Forming the Heart Shape
This will give you 24 stitches for a more defined heart shape.
6. Round 5: Creating Depth
The total stitch count will now be 30.
7. Rounds 6-7: Smoothing the Heart
Step 1: For the next two rounds, work 1 single crochet (sc) in each stitch around. This will help to smooth out the heart shape and provide a solid foundation for the coaster.
Step 2: Join with a slip stitch (sl st) to the first single crochet after each round.
9. Round 9: Defining the V Shape
Step 1: Work 1 single crochet (sc) in the next 2 stitches, 2 double crochets (dc) in the next stitch* around. This creates a defined V shape at the bottom of the heart.
10. Round 10: Finalizing the Edge
Step 1:
Work 1 single crochet (sc) in each stitch around to even out the edges and provide a clean finish.
11. Adding a Scalloped Edge (Optional)
Step 1:
For a decorative scalloped border, chain 3 stitches. Repeat this pattern around the coaster for a lacy, scalloped edge.
Step 2:
Join with a slip stitch (sl st) to the first chain-3 to finish the scalloped border.
12. Finishing the Coaster
Step 2:
This will secure your work and give the coaster a polished look.
13. Blocking (Optional)
Step 1:
if the coaster needs to hold its shape better, or if you want to smooth out any uneven edges, lightly block it. Wet the coaster and pin it to a flat surface, shaping it into a heart.
Step 2:
Allow the coaster to dry completely before removing the pins. This will help it maintain its shape and give it a neat finish.
Tips for Success:
Yarn Choice:
Cotton yarn is recommended because it is durable and holds up well under heat, making it ideal for coasters.
Gauge:
While gauge is not crucial for this pattern, using the recommended yarn and hook size will help ensure your coaster turns out the right size.
Consistency:
Maintain consistent tension throughout the project to avoid uneven edges and an inconsistent shape.
By following these steps, you’ll create a charming heart-shaped coaster that adds a personal touch to your home decor or makes a thoughtful gift. Enjoy the process and the satisfaction of completing a handmade item that’s both beautiful and functional.


0 Comments